1. Preliminary Explanation
In ZYBrowser, the team permission allocation needs to be achieved through the Role Management function. The system supports creating custom roles (with specific permissions bound) first, and then assigning these roles to team members, thereby precisely controlling the functions that team members can operate (such as environment management, proxy management, etc.). The following is the detailed operation guide.
2. Core Concept
- Role: A collection carrier of permissions (such as "Tester" "Administrator"), when creating the role, the permissions that the role can execute (such as "Create environment" "Modify agent", etc.) need to be selected.
- Permission Binding: After assigning a role to a member, the member automatically acquires all the permissions corresponding to the role (no need to set individual permissions separately).
3. Operation Steps: From creating the character to assigning permissions
Step 1: Enter the Role Management module
- Log in to ZYBrowser and enter the Team Management - Member Management interface.
- In the Member Management module, find the Role Management tab.
Step 2: Create a new role and assign permissions
Trigger to create a new character: On the character management page, click the "Create Character" button.
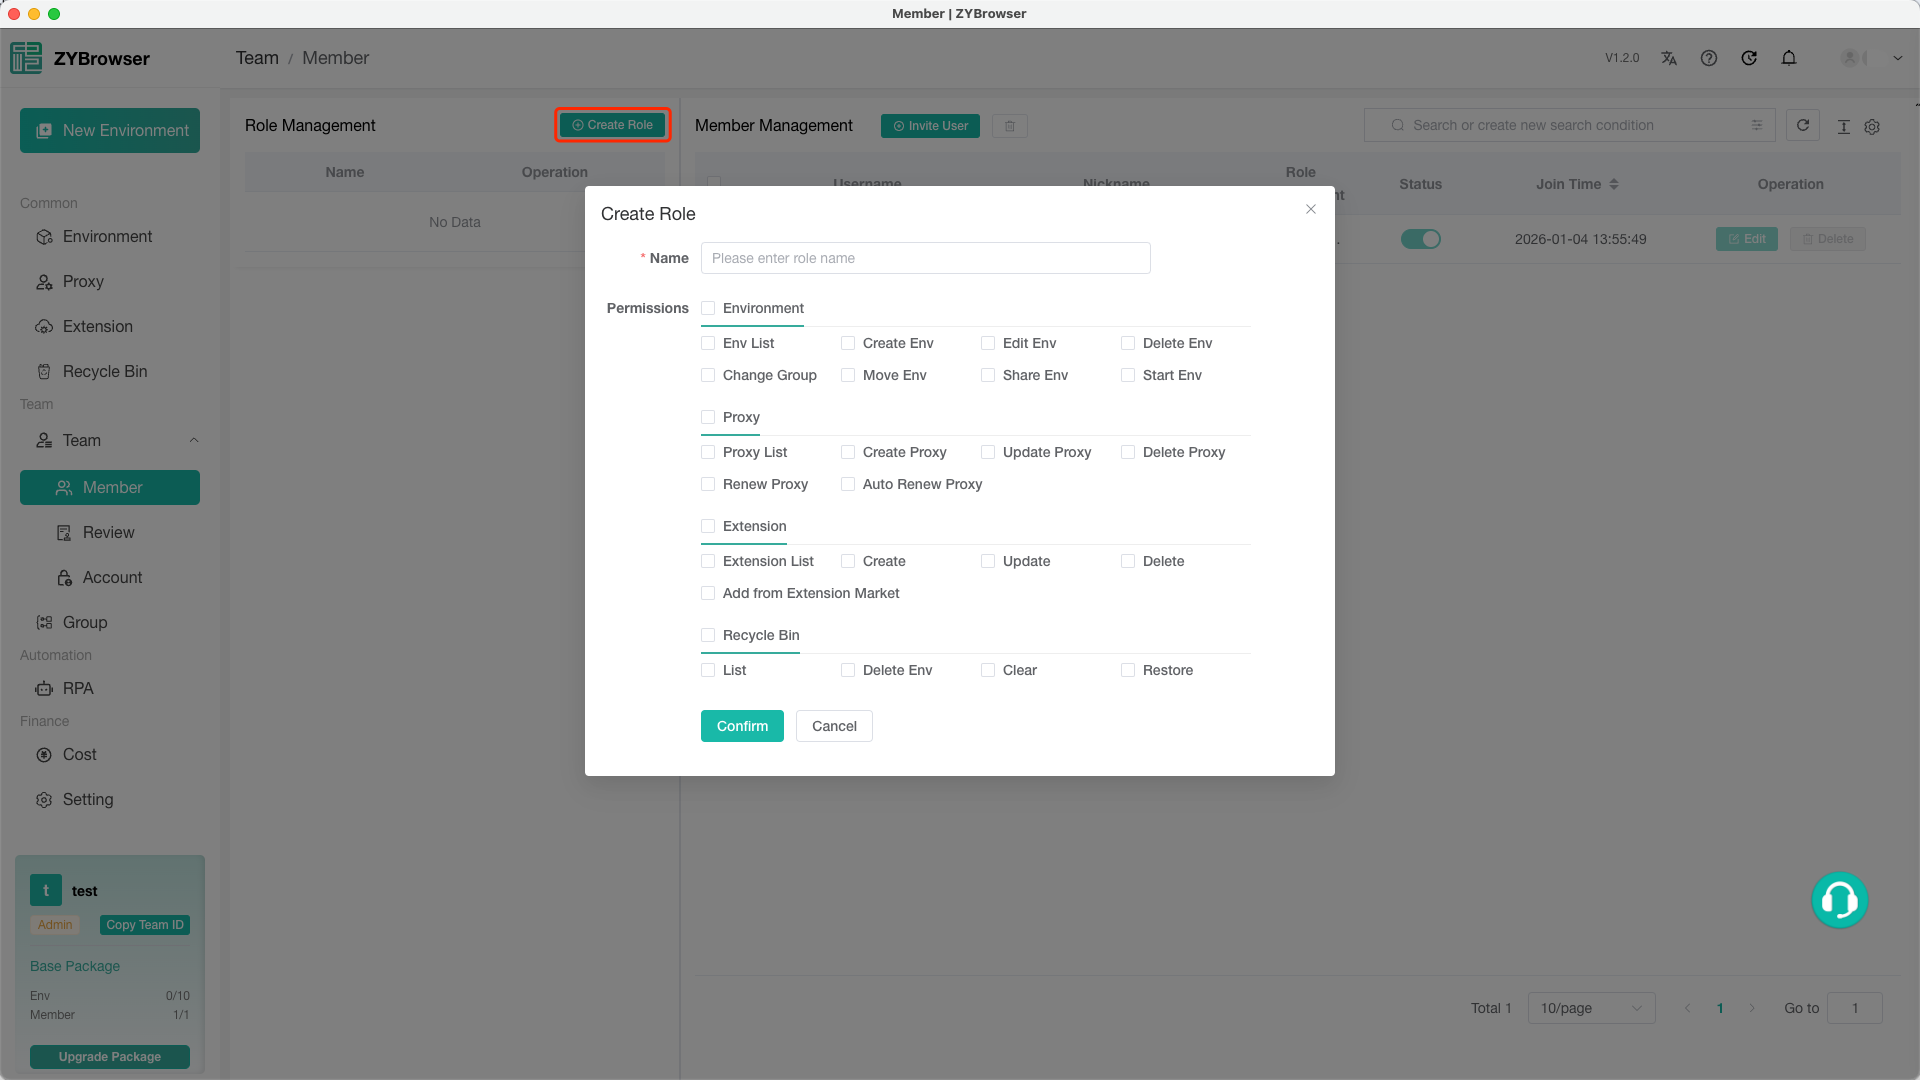
Fill in the basic information of the character:
- In the "Role Name" input field, enter the custom role name (such as "Test Specialist" "Data Analyst", etc. - it is recommended to be concise and clear).
Check the role permissions:
- The permission list is categorized by functional modules. Members need to check the corresponding permissions according to their actual needs.
Complete character creation:
- After confirming that the character names and permissions are correct, click the "OK" button at the bottom of the dialog box. The new character will be saved to the "Character Management" list.
Step 3: Assign the roles to the team members
When reviewing the application for member membership joining:
- By applying, simply select the pre-set role.
Enter the member management list:
- Return to the "Member Management" main interface (the "User Management" module in Figure 1). You can view the current list of team members (if the members are not displayed, you need to invite them to join the team first).
Binding character:
- Find the members who need to be assigned roles, and click the corresponding "Edit" button.
- In the pop-up member settings window, select the created role (such as "Test Specialist"), and click "Confirm" to complete the binding.
4. Notes and Frequently Asked Questions
4.1 Permission modification and deletion
- Modify role permissions: Go to "Role Management", find the target role, click the "Edit" button in the "Actions" column, re-check the permissions and then save to take effect.
- Delete role: If you need to delete a role, make sure there are no members bound to it first (otherwise deletion is not possible). After deletion, the members already bound to it will automatically lose the corresponding permissions.
4.2 Package limit restrictions
- Some permissions (such as "Adding Members") may be subject to the limitations of the team package. If you need to assign roles to more members, you need to click "Upgrade" to upgrade the package.
5. summarize
Through the "Role Management" feature, team managers can efficiently perform batch permission allocation and flexible adjustment. The core steps are: creating roles → selecting permissions → binding members. During the operation, it is necessary to pay attention to the package limitations and the rationality of permissions to ensure the security of team data and the efficiency of collaboration.
If you have any operational questions (such as the inability to save roles or the failure of permissions to take effect), you can click on the "Help Center" at the top right of the interface or contact the platform customer service for assistance~