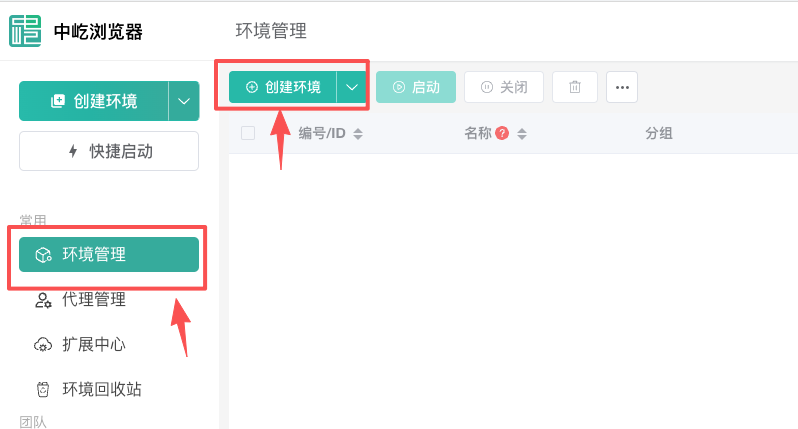
1、Select Environment Management on the right and click Create Environment
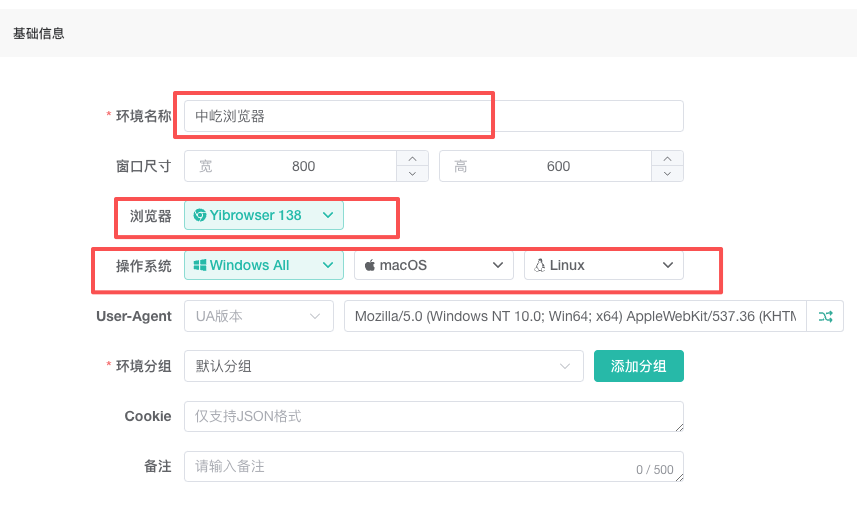
2、 Basic information settings (Environment name: give it a distinctive name, the browser default is fine, operating system)
(1) Environment name: Come up with a distinctive name
(2) You can set the window size as you like
(3) The browser can do it by default
(4) Operating system: Choose the operating system for your environment
Other settings can be left at their defaults, or you can set them individually
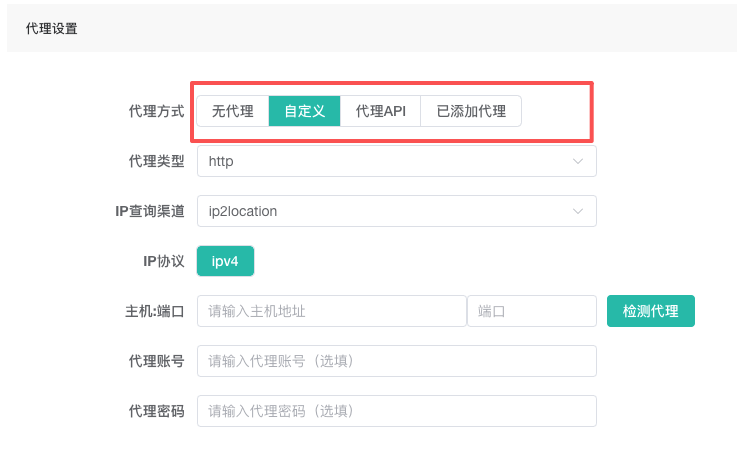
3、 Proxy settings (4 proxy setting methods)
(1) No proxy, no proxy IP configured
(2) Custom proxy, where IPs purchased from other sources can be set individually.
(3) Proxy IP API, input the extracted API link. Generally, dynamic IPs are used more frequently
(4) An agent has been added, and the IP purchased from within the fingerprint browser is being bound
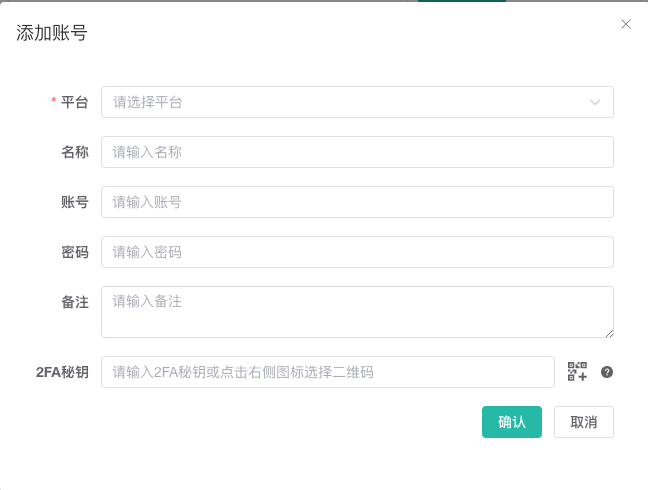
4、Account setup (You can add an account in advance by going to "Team Management" - "Account Management", or you can bind an account separately within the environment)
To bind an account: (1) if the platform is not found, you can choose to customize and add a platform link separately. (2) The name can be filled in as desired. (3) If logging in by scanning a QR code, you do not need to fill in the account and password. After entering the platform, you can scan the QR code to log in separately.
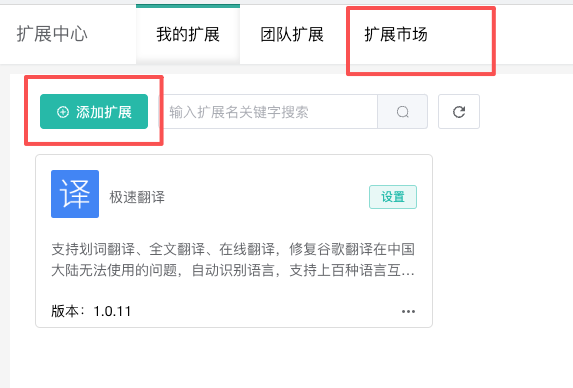
5、 Extension settings (equivalent to installing plugins for your environment. For example, if you install a translation plugin, then when you open an English website, it will be automatically translated)
You can download plugins from the Extension Center - Extension Market in the left sidebar. If you have your own plugins, you can also upload them separately.
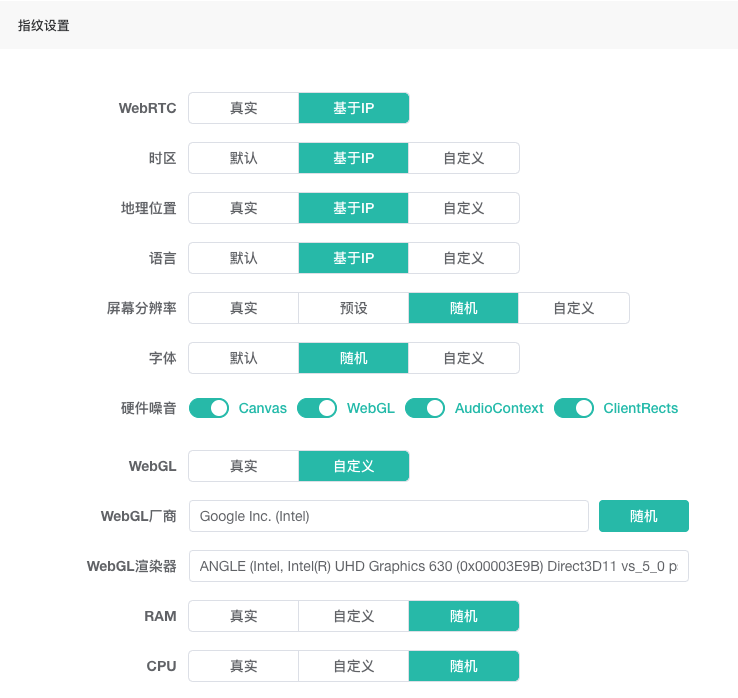
6、 Fingerprint setting (i.e., setting different parameters of your environment to make the platform think it's a different device)
Note: If you don't know how to set it, you can use the default settings
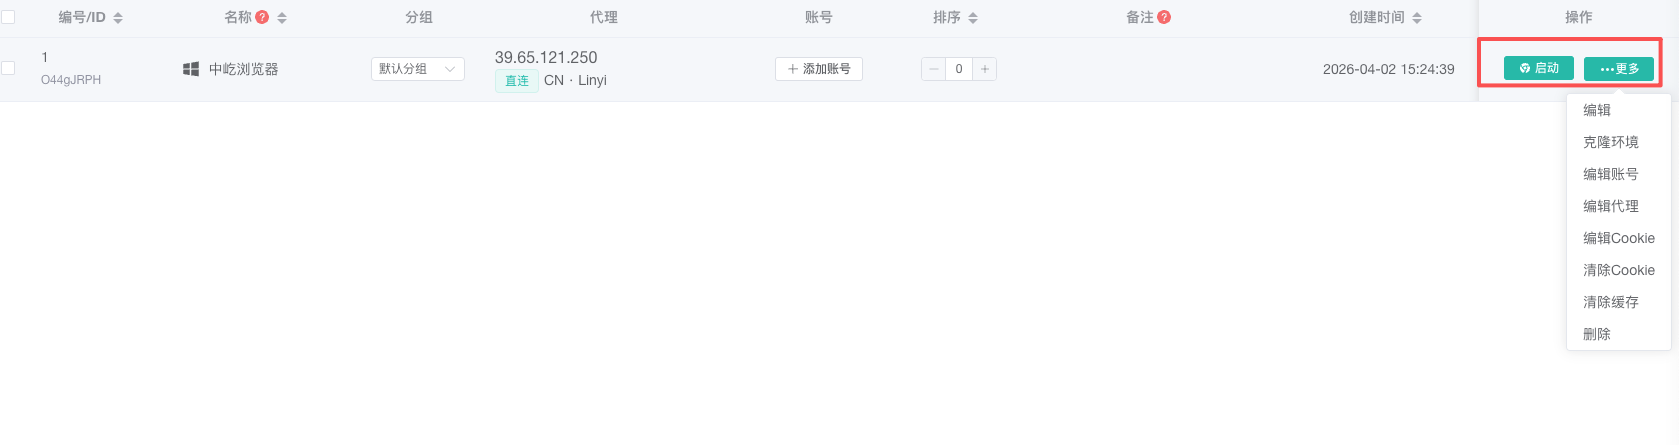
7、 After setting everything above, click "Save" to return to the environment management list. Click "Start Environment" to open the environment we just created, or click "More" to perform different operations such as editing and deleting.